


Stop Motion Secrets - Part 1 of a 3 Part Series with Marc and Landon Akiyama
If you are anything like us here at Kessler you feel that there is a special kind of magic that comes to life with stop motion filmmaking. Stop Motion captures the imagination and makes us feel like kids again. It also is something that can be challenging to do well. So when we came across the work being done by the Akiyama brothers, Marc and Landon, we had to reach out and speak with them.
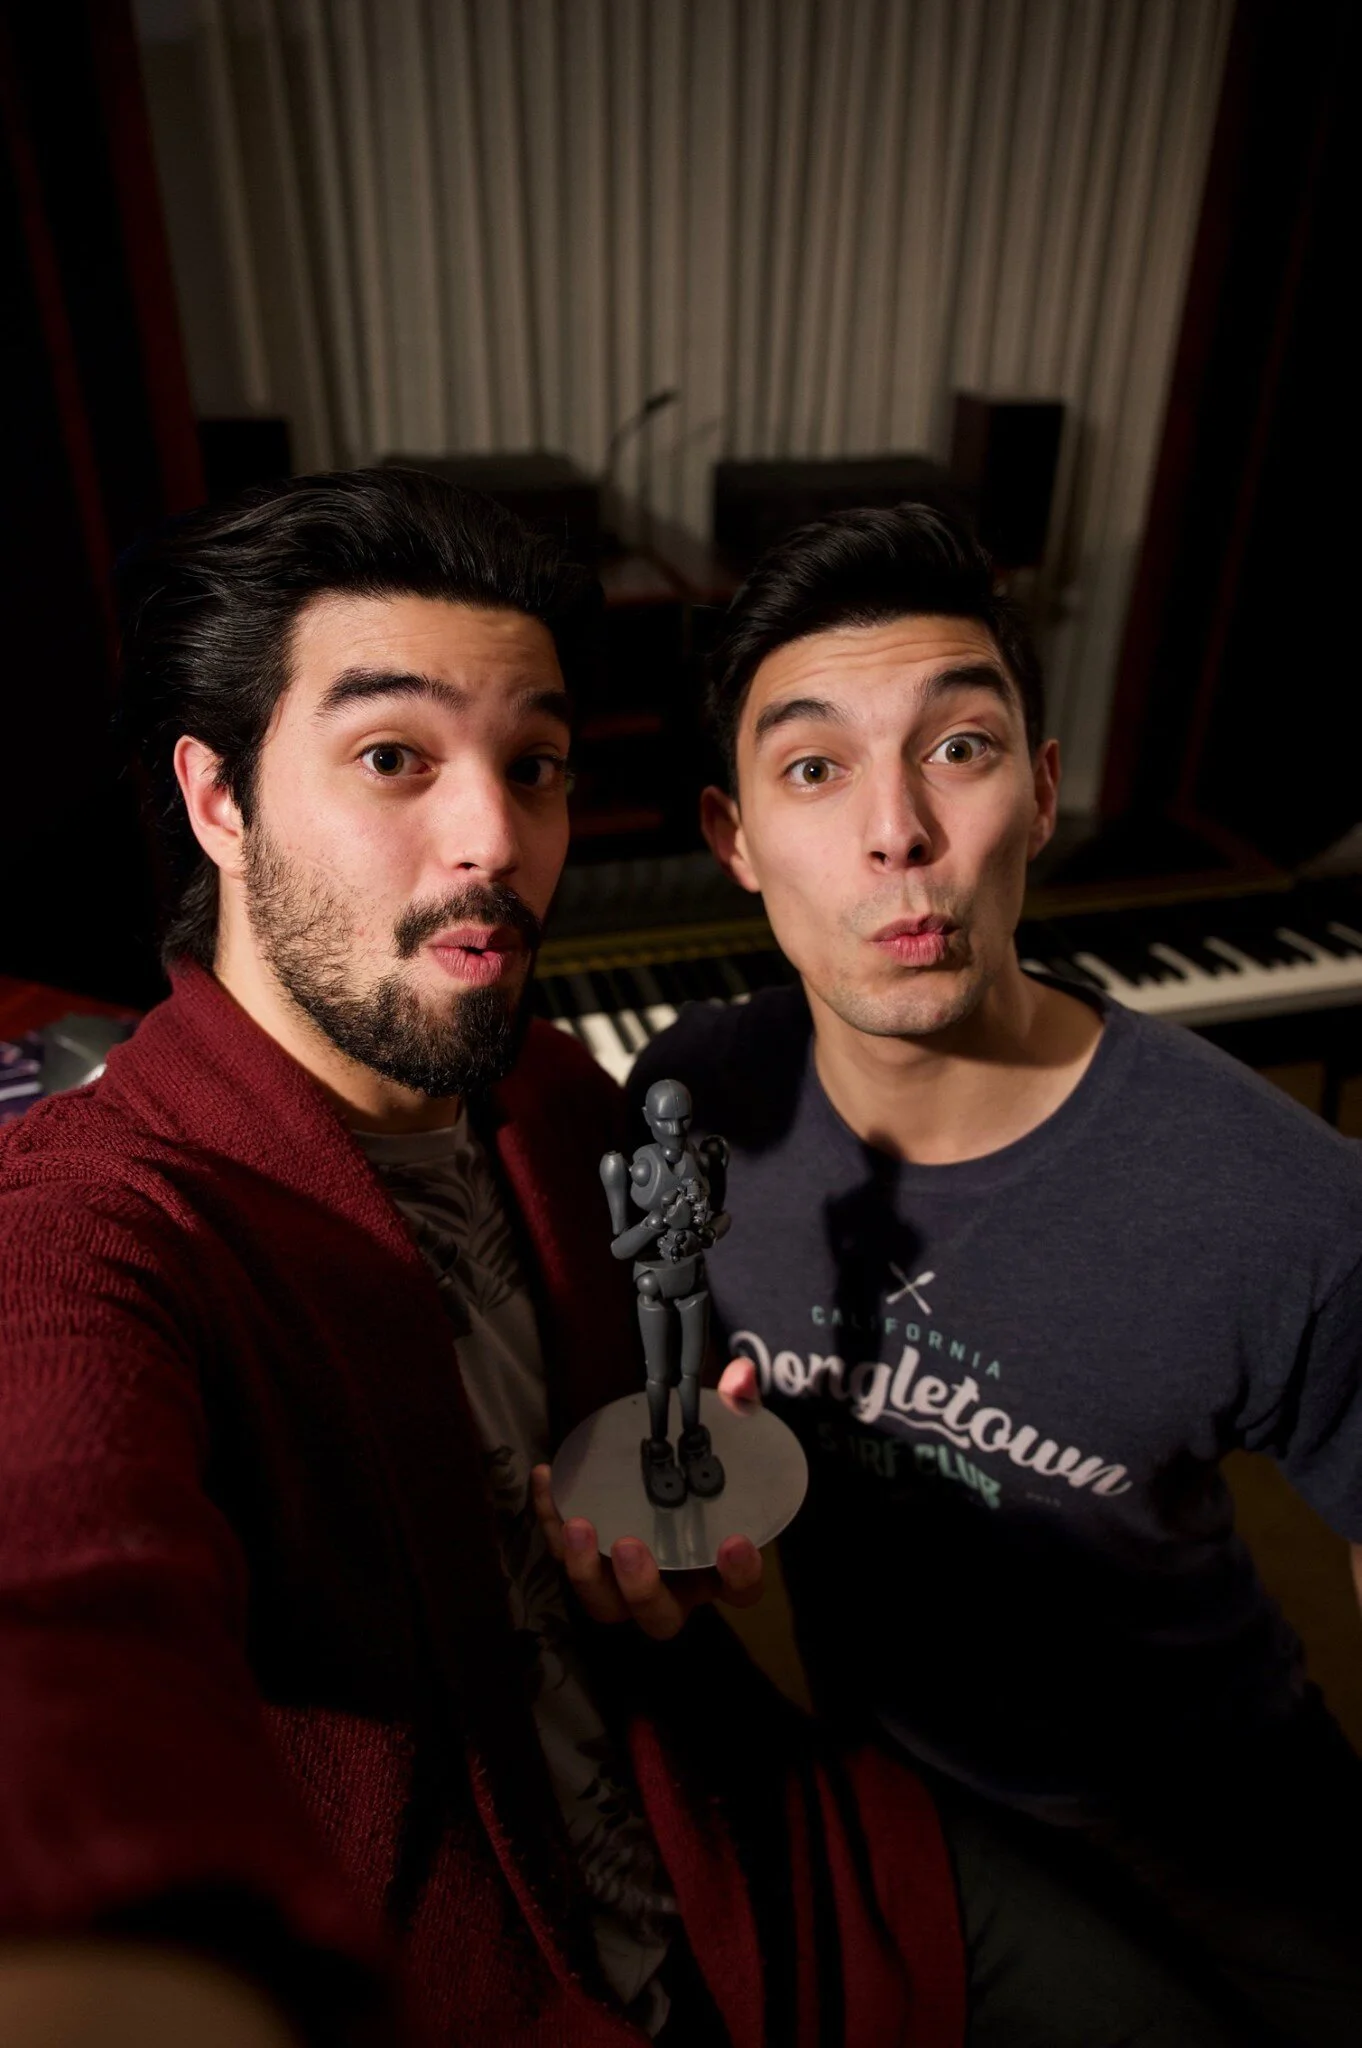
When speaking with Marc and Landon we learned that they work both as musicians in the film industry composing and recording film scores through their studio (Akiyama Music) based out of San Diego as well as doing stop motion and that they held a wealth of insights into the process that our audience could find useful and interesting. We pitched to them the idea of partnering up for a series of blog posts and they were on board.
Today in part 1 of Stop Motion Secrets we’ll get to know the brothers a little bit more and dive into their setup. In the upcoming articles, we’ll be covering an animation demonstration, helpful tips, and resources for creating your own stop motion films.
KU: Thanks for taking the time to chat with us! So let’s dive in. There’s a LOT to cover here, but let’s start with your history. You are brothers who are composers and filmmakers— what drew you to stop motion animation? It seems like any one of those niches could fill up your free time!
MA: Of course, we are really excited about this series! Yes, we are primarily film composers and musicians, however I’ve always been obsessed with stop motion and made short films with our pets all the time growing up. Stop motion is so intriguing, because it challenges you to be creative in so many different areas, such as costuming, set design, cinematography, photography, acting, and it is among the only mediums where you actually get to see the artistry and craftsmanship in the final product. Needless to say it was always a toss up for me if I’d become a filmmaker or musician, but I never let go of either and now I do both! They really do compliment each other though. One medium adds to the other and it’s great being able to write a song or score and then be able to change hats and animate the scene. It’s fun being a one stop shop to bring ideas to life.
LA: .. I remember one time when we were little, we made a short nature film with our pet lizards. Marc had a bearded dragon and I had two leopard geckos. We dug holes tunnels in the backyard and put our lizards in the tunnels. That was probably our first venture into film.
“Stop motion is so intriguing because it challenges you to be creative in so many different areas...”
KU: How many stop motion projects do you have under your belt? Can you give us a little synopsis about each? What was your favorite project?
LA: Most of my projects are Marc’s projects. He’s the tinkerer behind the stop motion projects and I’m the more of the assistant and technical help. Filming The Legend of Willow Creek was the most interesting for me. Since that was the biggest and longest we’ve spend on a stop motion project. It was really just us trying to stumble through the whole logistics of this project.
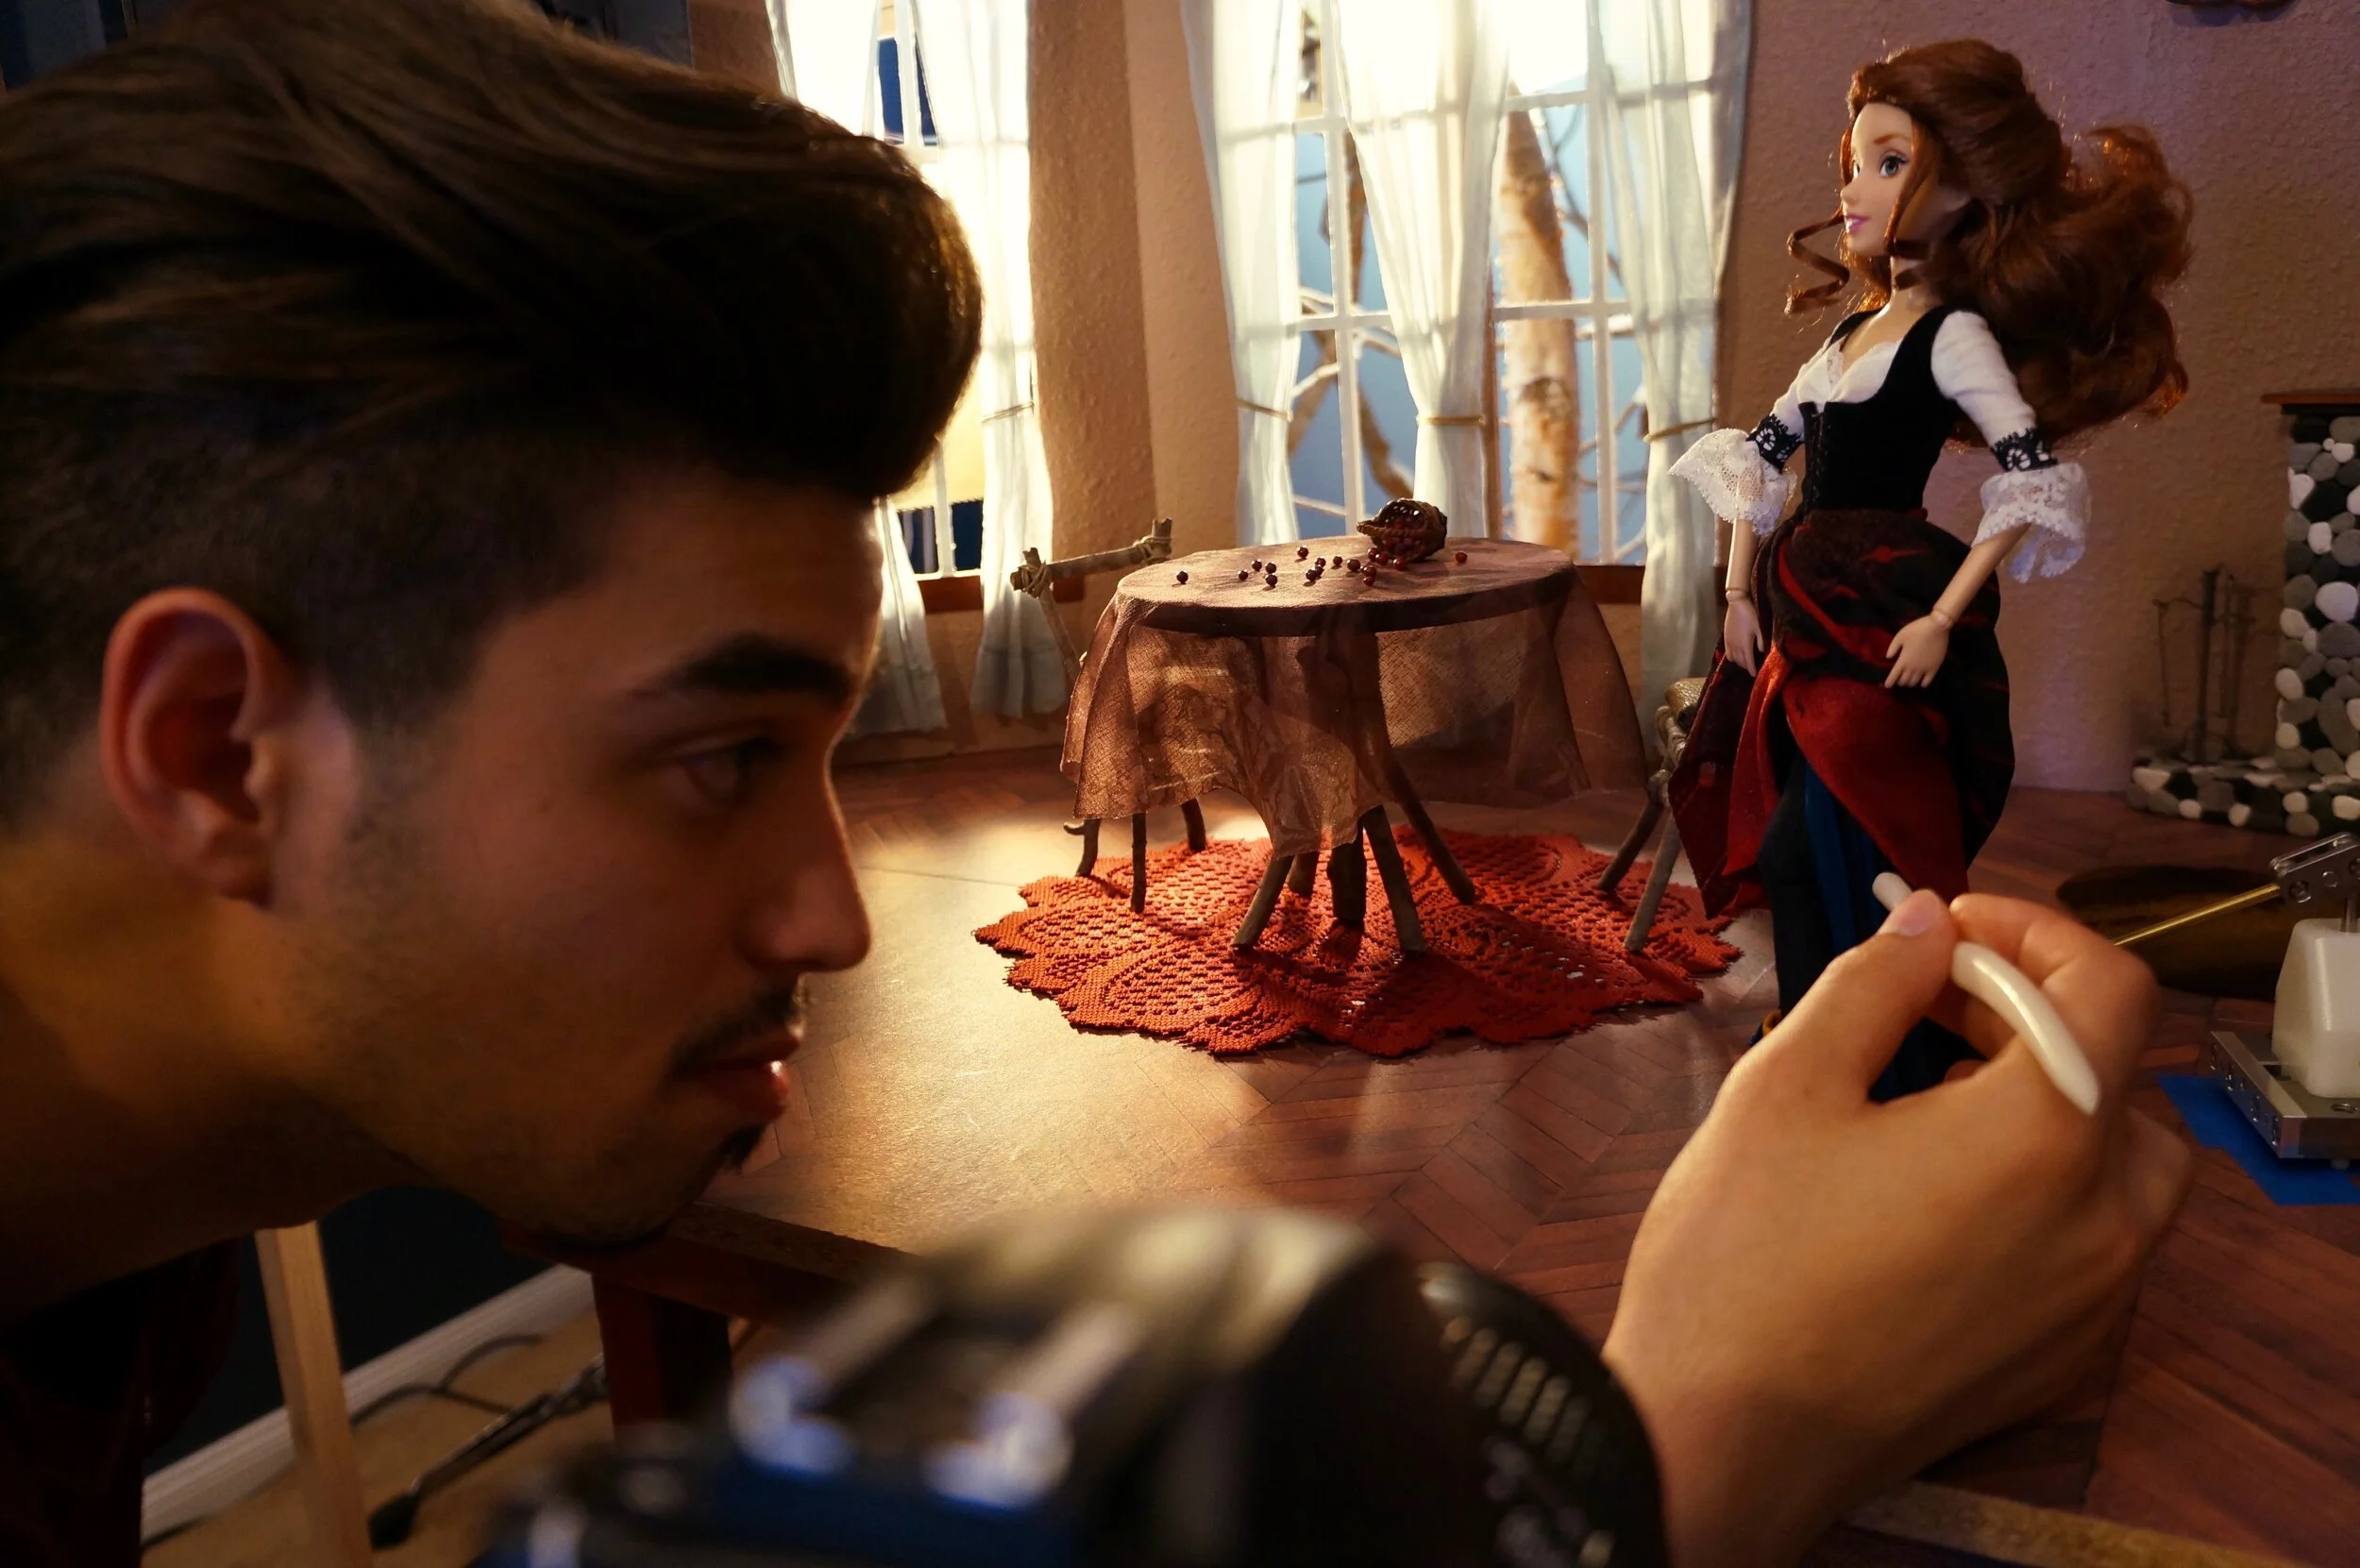
MA: Our first real venture into it was actually with the stop motion musical that we feature in the Tutorial Series called The Legend of Willow Creek. That was my deep dive into stop motion, and even having no previous experience, I wanted to have high standards regarding the quality of animation and the methods used. That one started as a short original musical, and is essentially a sequel to the Little Red Riding Hood story.
The story explores what would happen if we revisited her after her horrible experience with the wolf. What if this is the first time she is returning to the forest, and what if that reason was to surprise her Grandmother with a big birthday party. It was from that charming idea and after completing the songs and the libretto, I could see the story lending itself to stop motion, with all the various animals she meets along the way, and a beautiful snowy forest set, and the gruesome actions of the original wolf all framed in a whimsical musical. Then once I started to hone my stop motion techniques and could see how little tweaks in my approach would make huge improvements, as far as fluidity and performance of the puppets, I was hooked.
The next project I started but never quite finished was a Christmas Tree Slot Car Race. This one was inspired by decorating the tree one year with a Mustang and Camaro Scalextric Set. I drafted a quick storyboard of a race between these two cars and started animating, however never finished it as the tree died and turned brown before completing all the shots. That one was a bit difficult to film because the cars were just too low to the ground when I decorated, but it led to some cool test shots with the slider.
I typically do a stop motion project when I’m inspired by a creative idea or have something in mind that would make a nice visual to a piece of music I’ve written. Which I enjoy, it’s a tool I can pull out when I need and it definitely comes in handy, but my favorite so far is still The Legend of Willow Creek.
KU: What do you love about stop motion? How does it make you feel creating a new piece?
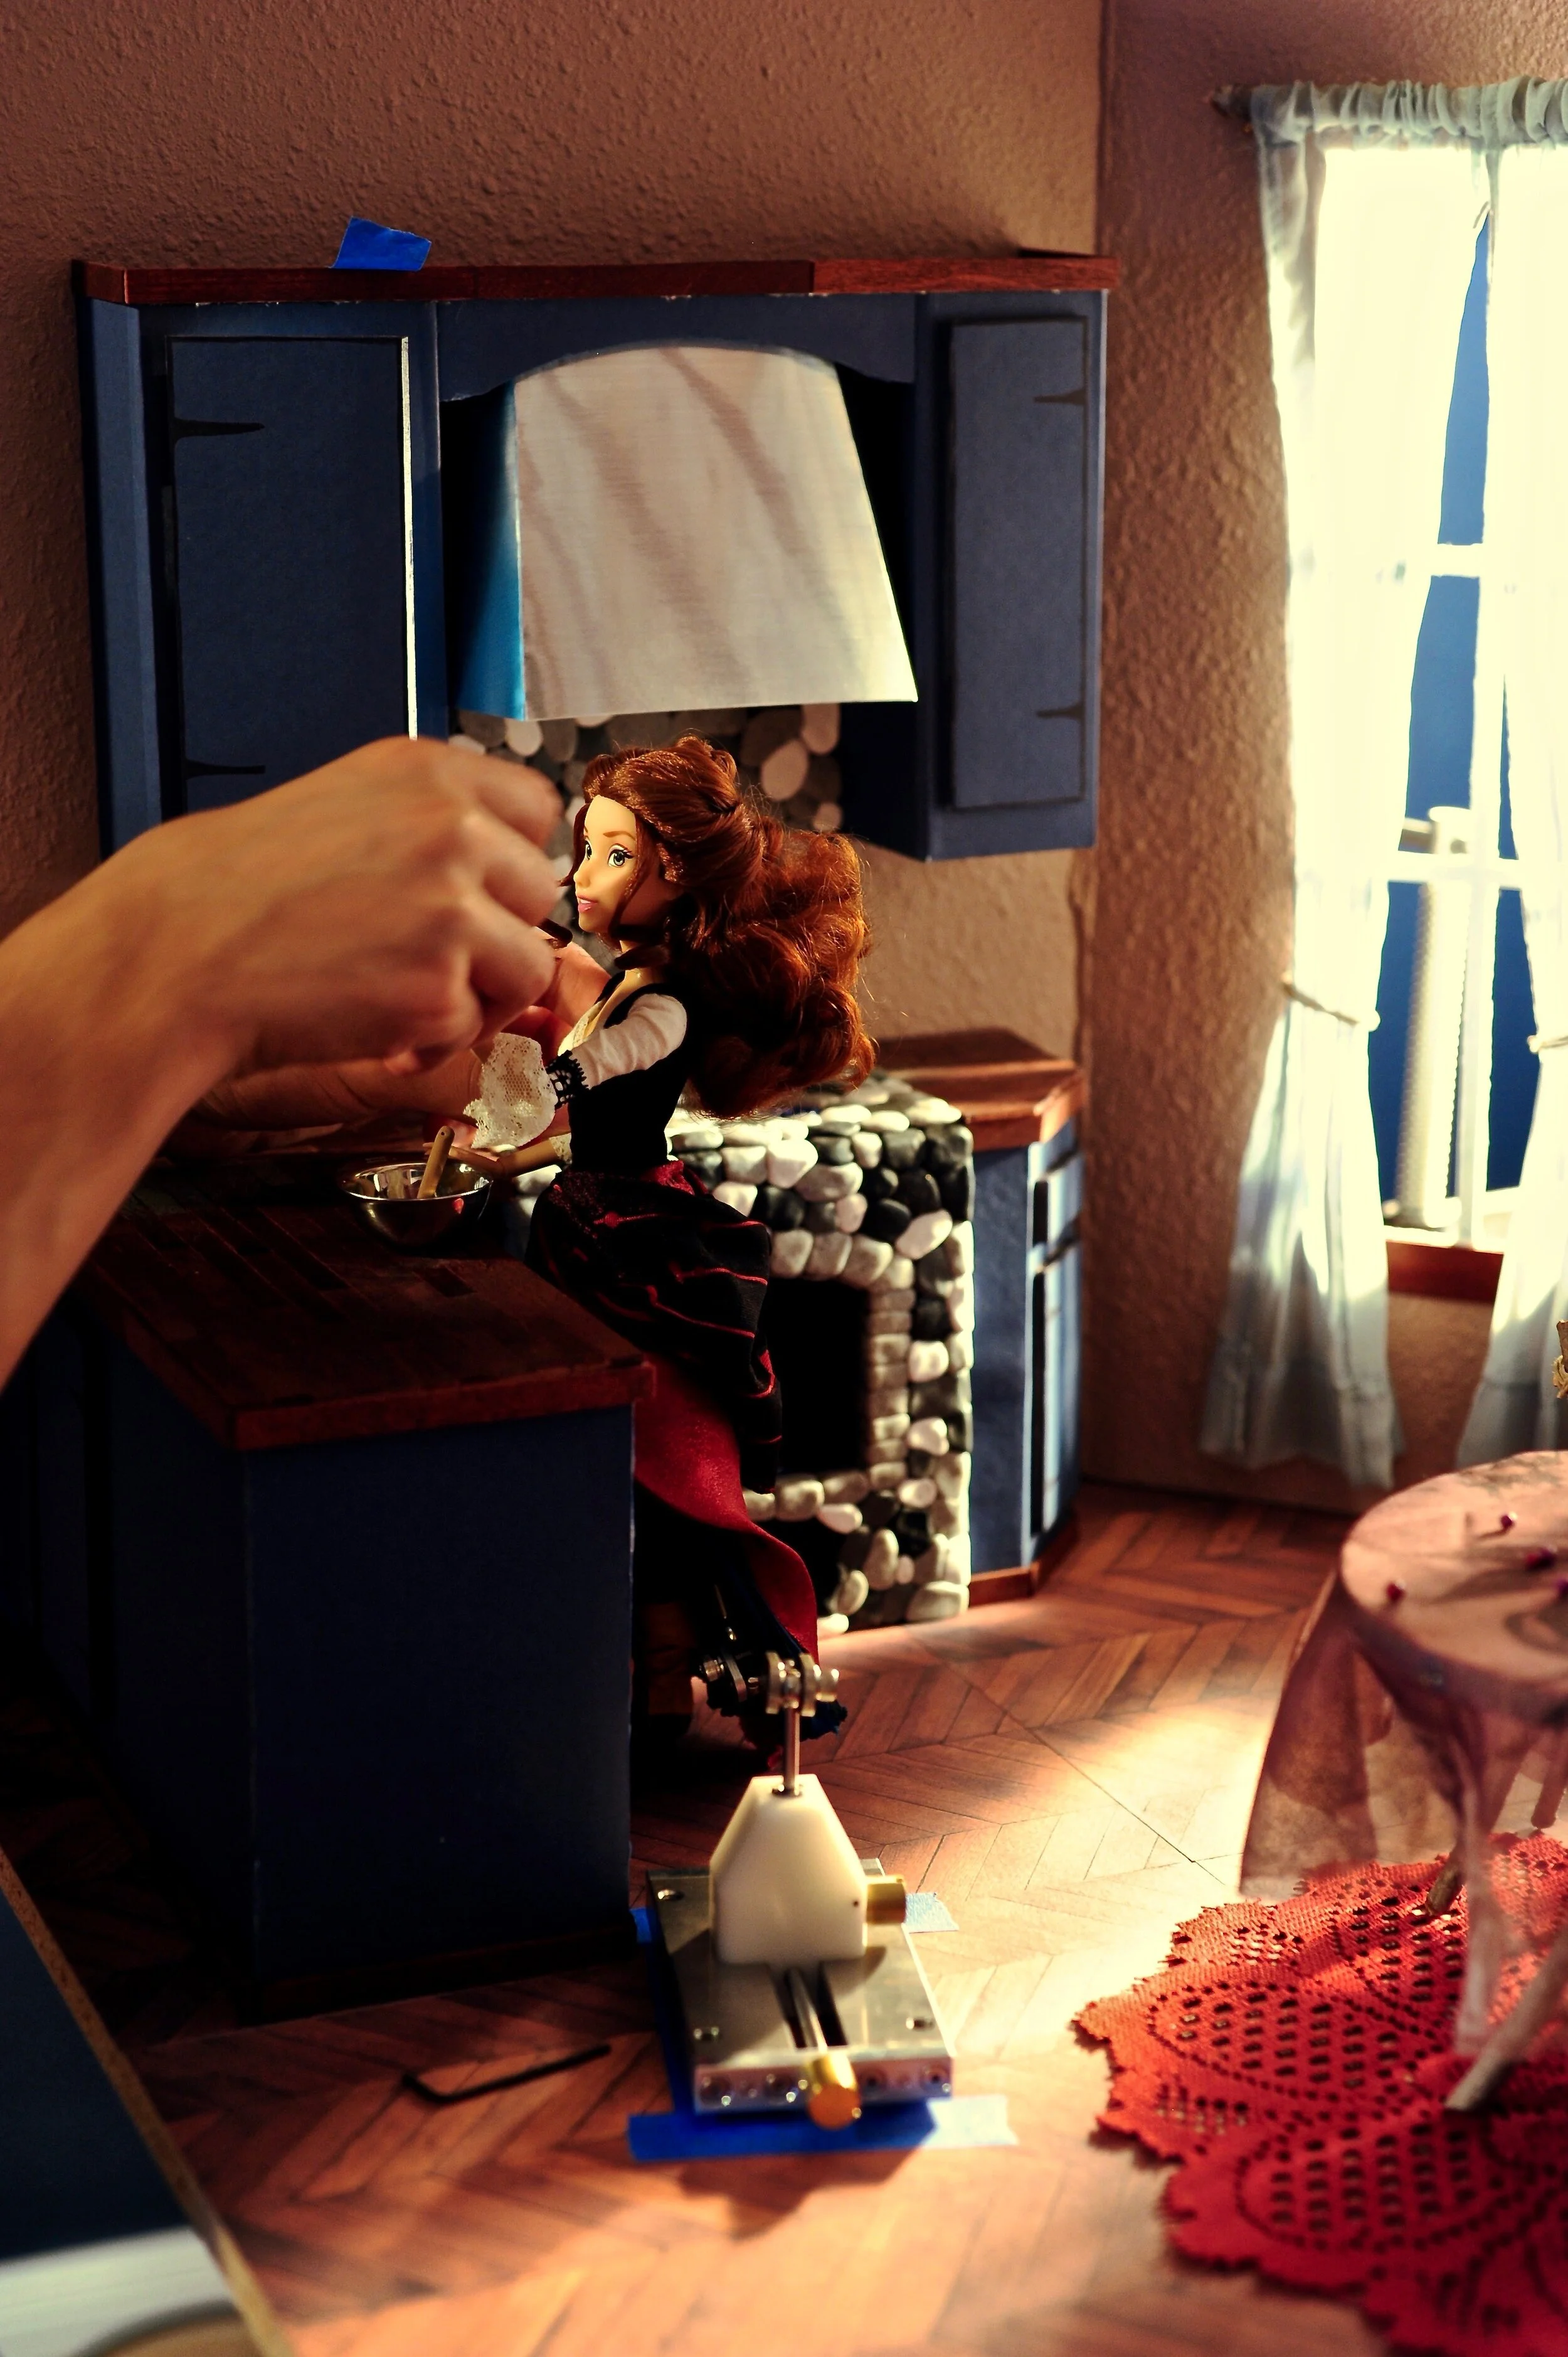
MA: Oh man, I could honestly talk about stop motion for hours. There are so many things I love about stop motion, but the main reason I’m drawn to it is that it is a medium that is completely done by hand. I have always been crafty and absolutely love building things with my hands. I absolutely hate doing things in the computer or in a virtual space. So for me, the beauty of stop motion is that it takes skill as far as Marc Akiyama craftsmanship and takes so many different departments/schools of thought. You have the design and set phase, the actual puppet creating and costuming, then even the animation phase is done by hand. Yes, you capture the pictures now with a digital camera, but I also love photography and have been a photographer for a number of years so it’s exciting that even that skill is tied in to stop motion.
LA: I think I love the authenticity of it. While you’re in the process of animating it, there really isn’t much to see. It’s not as glamorous as actors on a set and it takes time to animate a single frame. But when you put it all together and playback your work, that’s when the magic happens.
MA: I think my love of creating something tangible comes from being a musician. I’m so used to making music with my hands, being a pianist and percussionist, that it is the easiest way for me to be precise and exact. Could you animate in a computer? Yes obviously, and most films are made that way now, but there is something that comes across the animation much more vividly when it’s actually been handled by the artist and to me this is true for both stop motion and traditional hand drawn animation. When creating a new piece it’s a mix of frustration and excitement. It’s always scary because you worry that you won’t be able to animate what you have pictured in your head, or you also worry that if what you have pictured in your head just doesn’t end up looking as cool or as pretty as you thought it would. And so it’s back to the drawing board, but even the failed attempts still look so intriguing being made by hand
“I love the authenticity of it... It’s not as glamorous as actors on a set and it takes time to animate a single frame.
But when you put it all together and playback your work, that’s when the magic happens.”
KU: Your choreography was something that first drew our eye to your work. It feels really organic, especially when you realize it’s a fairly inarticulate doll you’re working with. How did you learn to animate fluidly? And getting a little more technical here, are you working on 1’s or 2’s with your animation?
MA: Ah yes, this is where you get me to divulged all my secrets now! There are definitely a few tricks I use to create an organic lifelike performance. First off, I always animate on 1’s. This is extremely important to me because my goal is to get the most believable movement possible. There is a quote from Glen Keane, a legendary Disney 2D animator responsible for our favorite characters such as The Little Mermaid and Beast and Tarzan and one of my favorites Duet, if you don’t know Glen Keane you have to look him up and study his work immediately. I promise it is so insightful as far as how you get the perfect performance out of a character and how you imbue the lifelike quirks that make us human.
Sorry, this is a long explanation already but it is important I promise! His quote was “Life is on 1’s.” So on 1’s and 2’s actually comes directly from hand-drawn animation and refers to whether or not you expose a drawing once or twice to lengthen the amount of time it takes up. There are a number of reasons you might want this and in many cases, it does make sense. For example, if you have a really slow movement let’s say a head tilt, you might hold that drawing for 2 exposures (or two frames) to keep the motion slow and you just don’t need that much movement between drawings. If you’re working on 2’s, which this would be called, it effectively cuts your workload in half because instead of having 24 unique drawings per second, you hold each for 2 frames so you only need to draw 12. Which is a huge advantage.
However, you end up with an animation that is a little more jagged and a little more choppy, because now your eye starts to notice when the frame change. So because I was animating Red Riding Hood dancing through this baking song, I needed to make use of every frame possible. So animating on 1’s was the only option because it resembles life. In a live-action film, each of the 24 frames has movement. Each frame captures the next progression of whatever action is on screen, you don’t hold the action for 2 frames, it just looks weird. So our eye is so used to the look of 24 individual pictures/drawings, that anything else is noticeable, and when you’re doing big grand sweeping gestures like in a dance, you need as many individual frames as possible to capture that so your eye can track the movement happening.
Now that doesn’t mean that when the character is holding still or they slow into a stop that you have to keep the character moving in the next few frames, in that case, you do hold the frames because again in real life people do hold still occasionally, so it’s important to have that balance.
There are a few other tricks I use to get the fluid performance, even when you have a pretty inarticulate doll. One is to track all the arcs of motion which I demonstrate in the next video, but the other really important one is don’t be afraid to go through and delete frames that don’t fit as you’re going. So say you took 5 photos and number 3’s just doesn’t fit with the rest. Maybe the arm moved a little too far down in that one or the spacing is suddenly different than it was, just delete it and see if you even needed it. As I was animating a shot, I would go through and see which photos were causing jitter or which ones were muddying up the action, and just get rid of them. I found that more often than not, I would animate and take too small of movements in trying to get a fluid animation. You don’t need to make as small of movements as you think. You’d be surprised what our eyes can actually follow, a lot of times you just need the suggestion and your eye fills in the distance travelled automatically. This process of weeding out the frames that don’t work for the shot is a lot like cleanup animation for 2D, where another artist would draw the final line from the animator’s roughs and you’d end up with the clear line and action
LA: There’s one technique that Marc talks about in the tutorial, which he learned from Aaron Blaise. You want your puppet to move in arcs. So each moment should follow an arc to make it look more smooth.
KU: Can you talk about your choices for working with these pre-made figures as opposed to the more complex ball and socket or armature wire-based puppets? Do you ever think you’ll work with more complex puppetry? Maybe something with lipsync or more expressive faces?
MA: Yes, indeed we are! So for TLOWC, because it was our first full film, we had to use existing puppets and customize them, simply because we didn’t have time to go through the development process for molding and sculpting our puppets. I do wish we spent the time to do that now or to develop a style that wouldn’t necessarily need a full-fledged puppet mold, but more like high-quality paper cutout puppets and do it more like a multi-plane camera setup, which we still might do for one of the more stylized storytelling songs in the film, where one of the characters, Jack Rabbit Johnny tells the tale of Red Riding Hood to the rest of the forest animals. But yes, the decision came out of a cost and time-saving restriction. I would absolutely love to work with complex ball and socket characters. I actually had a few designs, much like the Corpse Bride puppets, where you have gears accessed by Allen wrenches in the ears and such to get the mouth movement and eyebrow articulation, but just haven’t had a chance to build them. It’s actually a project on the shelf with my father, as he is a tool designer and can build pretty much whatever I can come up with, which is extremely helpful.
Unfortunately, all that takes time and I haven’t experimented with molds and different latex vs rubber materials to make the puppet coverings with so that would need more research as well. It probably won’t happen for this film because the rest of the characters are animals covered with fur, which is a whole other extravaganza, but in the future, I would love to develop a one-character story that utilizes a fully expressive face.
Replacement animation faces are another option, but those 3D printing machines are fairly high end and I’m honestly not a big fan of being locked into a face once it’s printed. Even though you can print as many expressions as you want and as many combinations, it still locks you into deciding what the face should be prior to actual animation, and if I had to sacrifice a number of expressions for more spontaneous decisions, I am happy to do so.
LA: Lipsync would be amazing to work with. We just don’t have the technology to do it the way we would like to yet. I’d like to emulate something like what Laika does with their 3D printed faces to swap expressions.
KU: For anyone looking to get into this, what’s the best way to get started?
LA: The best way to get started it to just start, try it and learn from error. That’s the best way to figure this out. We kind of set up our Tutorial to help anyone who’s interested in trying it out for their first time. We mentioned some motion apps but if you just want the quick and dirty way, you can use any video editing app to import your photos into. This will have a similar effect, but won’t be as good as using say, Dragon Frame. But if you’re new and want to invest as little as possible, that’s the way to do it.
MA:…grab your favorite action figure, or doll, or even cutout paper, get a tripod for your phone, and download any of the stop motion apps. There are a ton now, so use what you have and try it out! Experiment with how you move an object, notice things like how much you are moving that object and see what ends up looking natural to you…Fair warning, your first one will look bad. It will look jagged and choppy, but use that and see what you can do to improve it. There are tons of behind the scenes videos of all these big studio stop motion films, check out some of them and see what animators say, watch how they work and see what their approach is like. Everyone is going to have their different approach, it’s going to be some combination or mix of technical, analytical, and art.
KU: So let's talk gear— you guys touch on that in this first part of your tutorial series. What is your ideal setup for stop motion? What about for someone just starting out
LA: For someone just starting out, really what you can get your hands on is the best. There’s a saying among photographers: “the best camera is the one that’s with you”. You really don’t need much, your camera phone, a tripod, and some video editing software like iMovie. You can import the sequence of photos and set them to display .01 second or so and export the project as a video file and there you go! From there you can upgrade your equipment as you see fit.
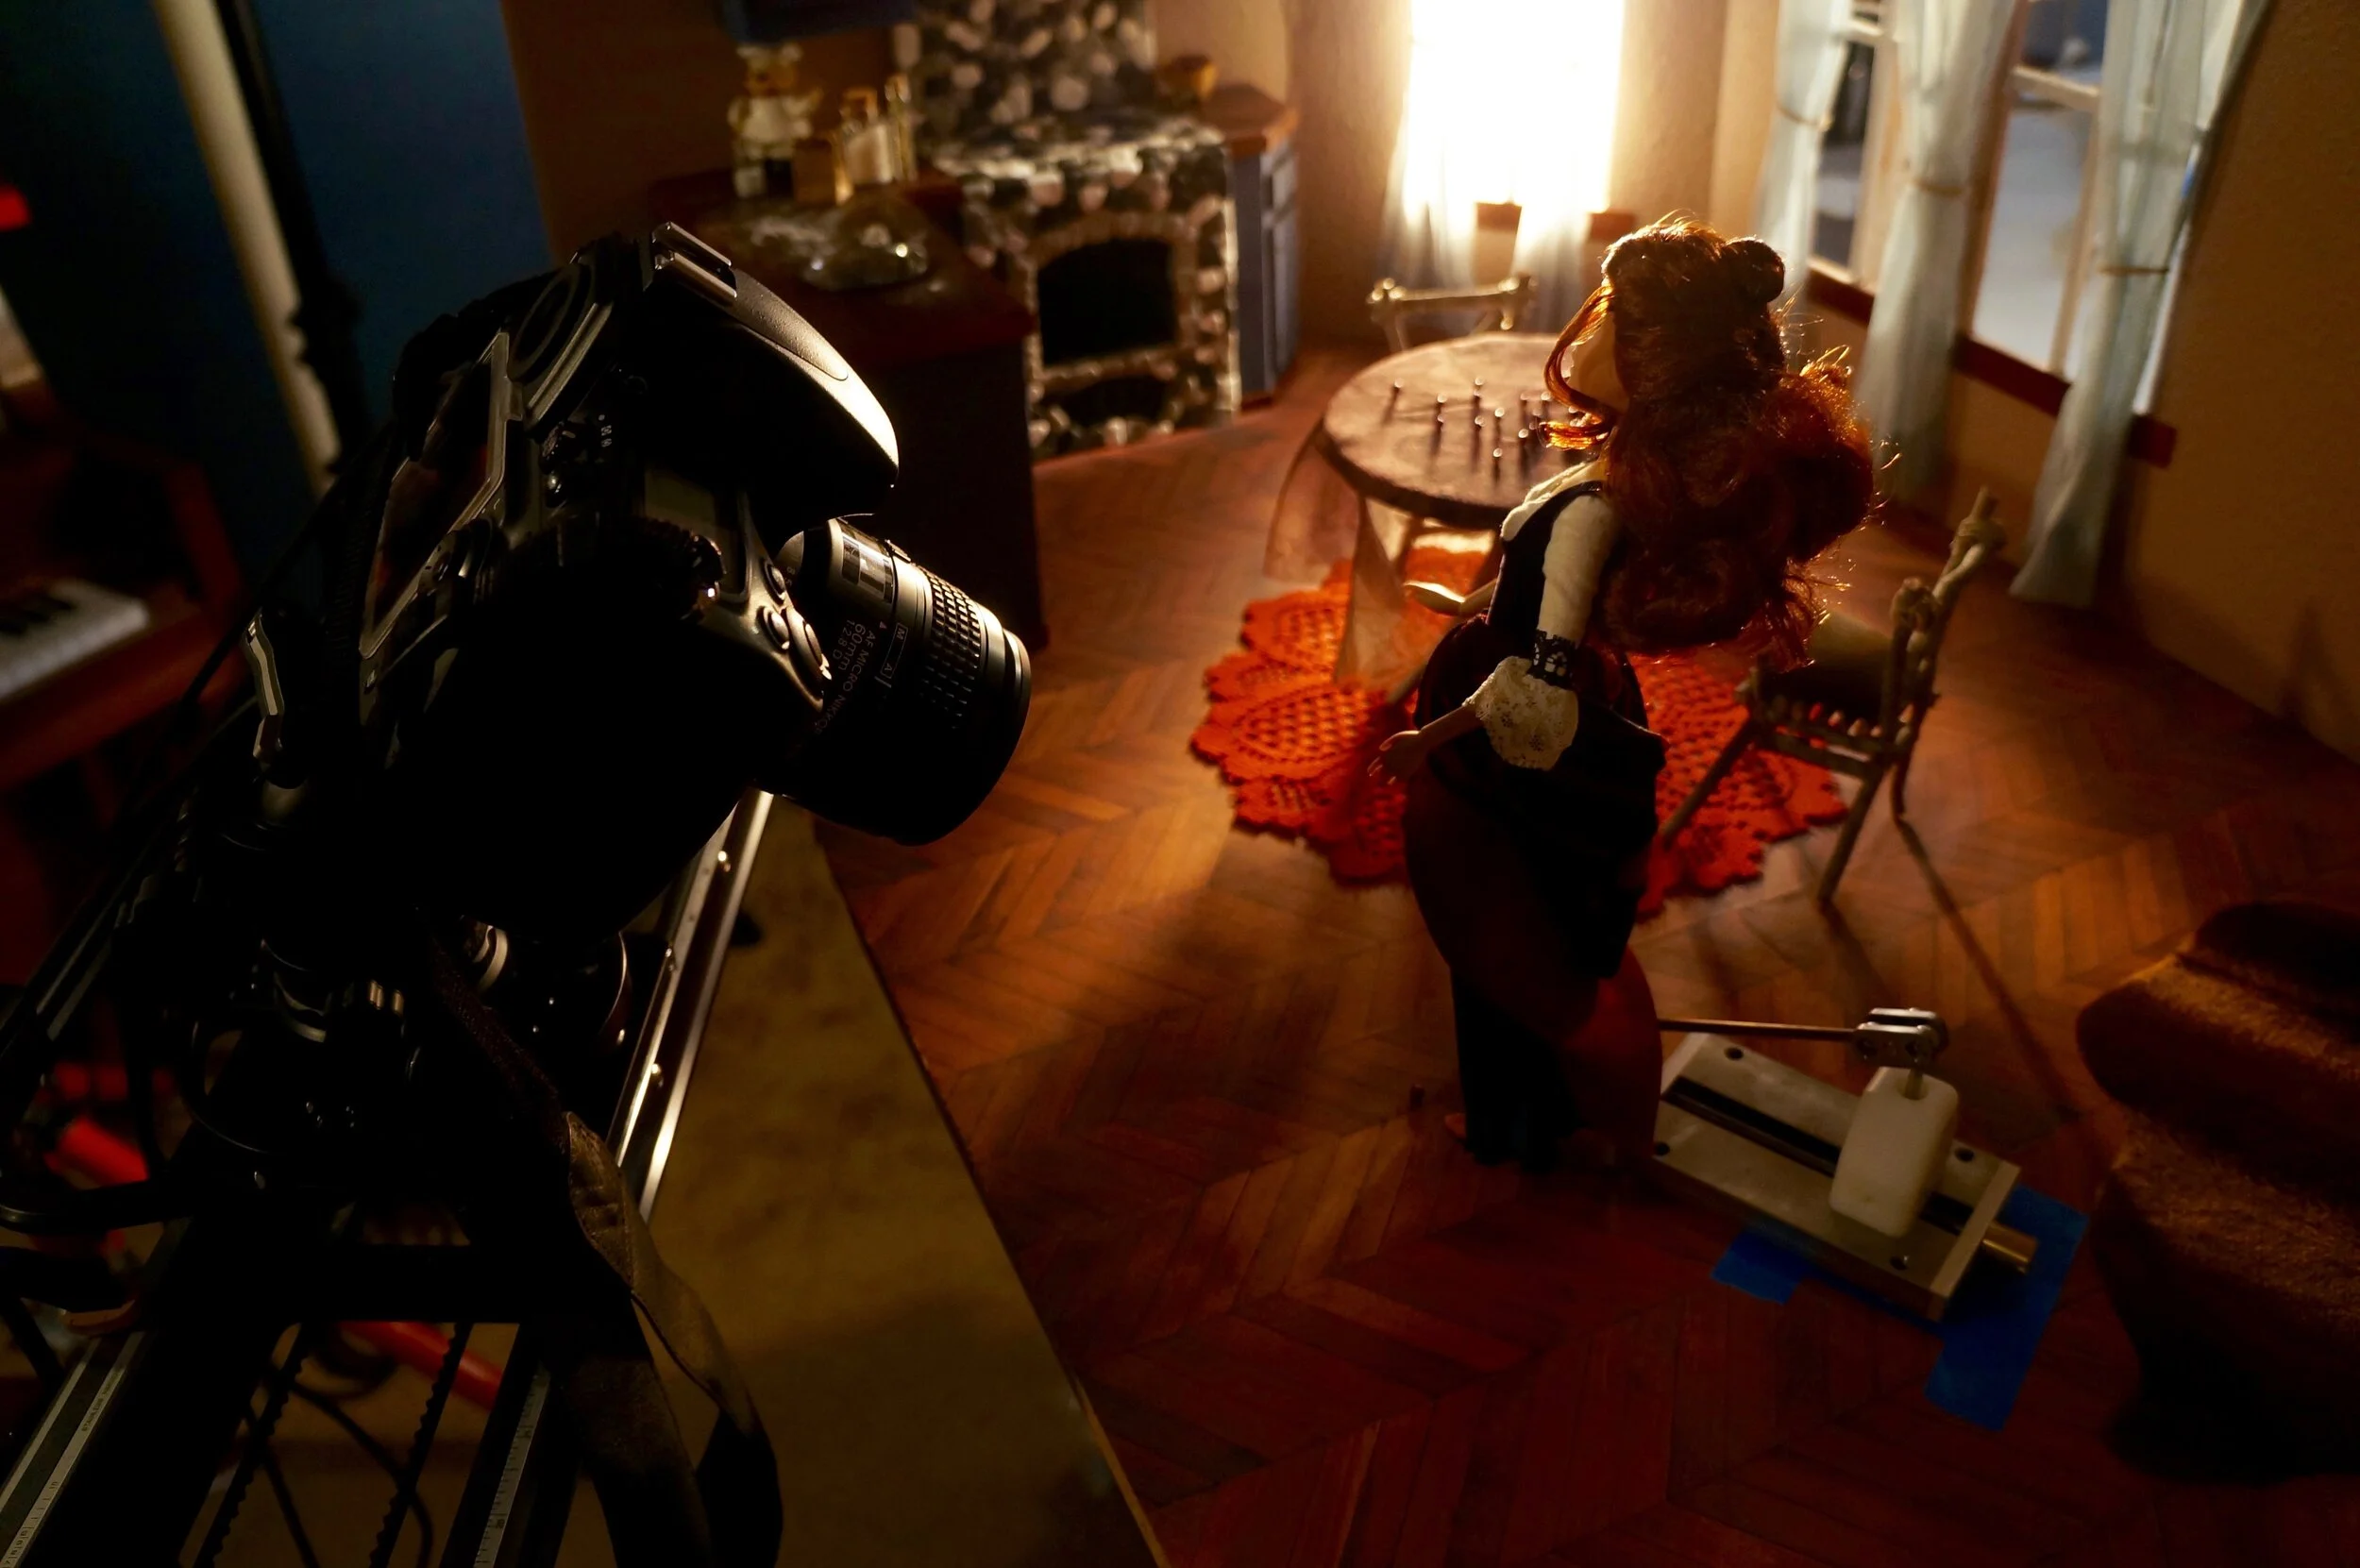
MA: Gear is important for stop motion, you really need a sturdy tripod at the very least. You need it to be able to hold the camera perfectly still, you don’t want the camera to drift or fall in the middle of animating a shot. This also goes for accidental bumps. We use the Kessler K-Pod with a Cineslider mounted on top. The K-Pod is so rigid and heavy that once you place it and lock it all down, it isn’t going to drift or move at all. The slider on top provides all the movement you really need for smaller stop motion projects. You can use it to pull into your characters on a horizontal plane, or you can position it vertically and use it to get a small scale jib shot tracking down through the trees. We have the Parallax attachment with our slider and this provides an even greater range of motion. I probably overused this feature, but it was great for my shots because it can add even more depth by keeping the subject fixed while the camera slides along an axis. So it lets you do more intricate moves. With the tripod and parallax slider, you can achieve a really wide range of shots, and they are so well built. The machine work is beautiful and when you have gear that is not only extremely well built, but also reliable, it just makes animating so much easier. With that said, if you are just starting out, you need a rigid tripod to keep your camera stable. You also need a camera, you can start out with your phone, but I highly recommend a mirrorless camera from any of the big three companies, Nikon, Canon or Sony. The mirrorless ones are small enough to get right in there on the miniature sets and they don’t have the issue of possibly burning in your sensor as you do with DSLRs. We are Nikon guys, because we love the color science they use and their new Z series cameras have been really great for stop motion. You can really go down a rabbit hole with cameras though, so you’ve been warned!

KU: Can you talk about working with the Second Shooter Pro? What does motion control do for you as storytellers, and how has it helped make you more creative filmmakers?
MA: Second Shooter Pro is so incredibly simple, and I mean that in no way as a bad thing. When I was first starting out, I knew stop motion studios used motion control, but it seemed like one of the more daunting things to achieve because a lot of the behind-the-scenes showed the studios’ custom devices to control these big rigs. So I initially thought of those types of shots as luxury shots and I’d have to limit myself to less ambitious camera moves, until I found Second Shooter. The motors are so easy to mount and set up with the controller. It’s easy to program start and end points and once you have that, you can repeat these moves indefinitely, which is so freeing for stop motion. It means that if you make a mistake in animation and need to back up a few frames, the camera can back up with you. It also adds a layer of camera movement with pan and tilt, which can get you a more dynamic shot. So it allowed me to storyboard more creative scenes because I knew I could move the camera in a controlled way along multiple axis points. As a side note: we use a Pocket Jib for our live film work as well and have designs to convert it to use the Second Shooter motors to control it incrementally so we can use it for stop motion work as well, but we have yet to build that. Once we do though, we’ll be unstoppable!
KU: What is the most difficult lesson you learned about stop motion?
MA: Oh there are so many, it seems like each animation teaches you something new. I’d say the biggest thing I learned, and it’s something I always have to remind myself is to not be afraid to get in there and move the puppet. Anytime I start a new animation and it’s fresh, no pictures taken yet, or it’s a new puppet that I’ve never tried to manipulate before, I always start off a little too careful. I don’t want to move the puppet too much in case I ruin the shot and can’t move the puppet back in the right spot, but you can’t worry about that. The puppet is meant to move and your eye can really follow more than you think, in terms of seeing the animation stitched together, so don’t be afraid to move the puppet in large increments. As soon as you let go of that initial hesitation, your animation starts to loosen up and come to life. It’s almost like the puppet knows where it wants to go and you’re just following it.
LA: The most difficult lesson I learned about stop motion is probably patience. You have to have more patience than anything else in this industry. There’s a bit of a technical background that could be helpful such as a basic knowledge of photography can help — properties of exposure, framing, and composition. Also an understanding of how to edit photos to get the look you might want in the post process.
KU: When I delved into learning about stop motion for myself, it seemed like everyone had all sorts of adhesives, tools, rigs, and all these little tricks to animation... where if you followed everyone's advice, you could end up with cartloads of equipment, clay, putties, resins, glues, wires, paints, hand tools, and random assortments of materials, etc. in order to be prepared to animate. What non-film related tools do you use regularly in stop motion? Anything we wouldn't expect that you just always have on hand when animating?
MA: I do have a few different things that I keep nearby. A couple clay tools, blue painters tape, aluminum wire, and rubber cement. I use the clay tools to lightly articulate clothing articles, such as a skirt or a cape. The painters tape comes in handy to tie down lose items, to perfectly frame clothing, or random things as well. Aluminum wire in case I need to make a rig by twisting it together to help hold up items that a puppet might hold, such as the pencil in the Stickybones animated clip in Part I, and the rubber cement in case I need to add a little more grip to objects, or temporarily stick them to the set. Nothing too special really, but so far that’s about it!
KU: This is a multi-part tutorial series you're putting together. Can you give us a little glimpse into what all you plan to cover in future episodes for folks to look forward to?
LA": There’s a lot that we cover in the next videos, but the second one is a walk through of an animation process and the third one is where to find more information and what inspires us.
MA: Yes! So Part I is an introduction to who we are, a brief explanation of how stop motion works, the different types of puppets and tools used, a little about our setup and our gear, as well as a look at the project we’re focusing on for the series. Part II is where it get’s into the specifics of planning a shot and I take you through an animation demo of one of the scenes in our film. Finally, Part III is all about various stop motion resources, and some great puppets/figures that are available to get you animating. The whole series is a look at what works for us and how we found ourselves in this art of stop motion animation.
KU: This has been great chatting with you. We can't thank you enough for your time, and sharing all this knowledge with us. How can people follow your work?
MA: Thank you so much, it’s been a pleasure creating this series and providing a look into this elusive stop motion world. You can follow our film and animation work at Retro Rocket Studios on YouTube and @retrorocketstudios on Instagram. Our film scoring website is AkiyamaMusic.com or Akiyama Music on YouTube and Instagram as well. Feel free to reach out to us if you have questions or comment on the YouTube series videos and we’ll be happy to chat! It’s been great talking with you and we’re very excited for this series!
LA: Feel free to follow our YouTube page, Website akiyamamusic.com, and our Instagrams:

